ROBOGUIDE
The FANUC ROS 2 Driver can control virtual robots in ROBOGUIDE.
ROBOGUIDE’s Plug-Ins and software options
The fanuc_driver works with HandlingPRO without any additional ROBOGUIDE Plug-Ins.
When you create a workcell with a robot, install the required software options into the virtual robot controller.
Select
Create Robot using Robot Creation Wizardwhen creating a workcell.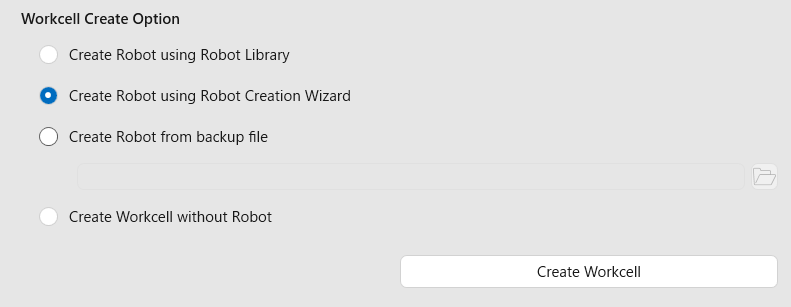
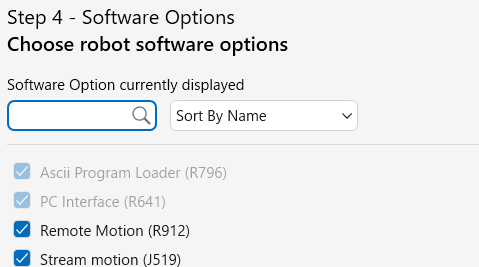
Select the required software options in the wizard.
Robot Network Configuration
You do not have to configure the network settings of the virtual robot because ROBOGUIDE automatically assigns the port to the localhost of the host computer by default.
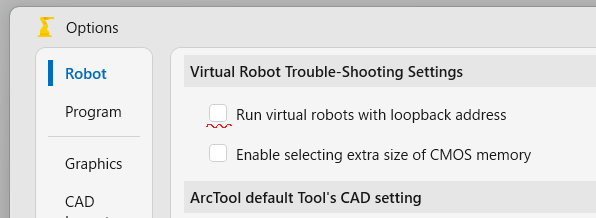
If the checkbox “Run virtual robots with loopback address” is checked, uncheck it to make virtual robots visible to the network.
Windows Firewall
You should disable the Windows Firewall to establish a UDP connection.
WSL2 on the Same Windows Machine
Set WSL2’s networkingMode to Mirrored instead of NAT, otherwise, UDP packets sent to ROBOGUIDE on the same machine will be blocked.
CRX’s DI/DO setting
The CRX series uses example_gpio_config.yaml, which assigns DI/DO[101-112]. ROBOGUIDE’s default DI/DO assignment splits the DI/DO indices, causing the GPIO configuration packet to fail.
Please perform one of the following procedures to avoid this failure:
Using fanuc_gpio_config_small.yaml
You can avoid the failure by using a smaller gpio configuration file.
ros2 launch fanuc_moveit_config fanuc_moveit.launch.py gpio_config_path:=config/example_gpio_config_small.yaml
Using fanuc_gpio_config.yaml
If you want to keep using the default one, configure the virtual robot controller’s DI/DO.
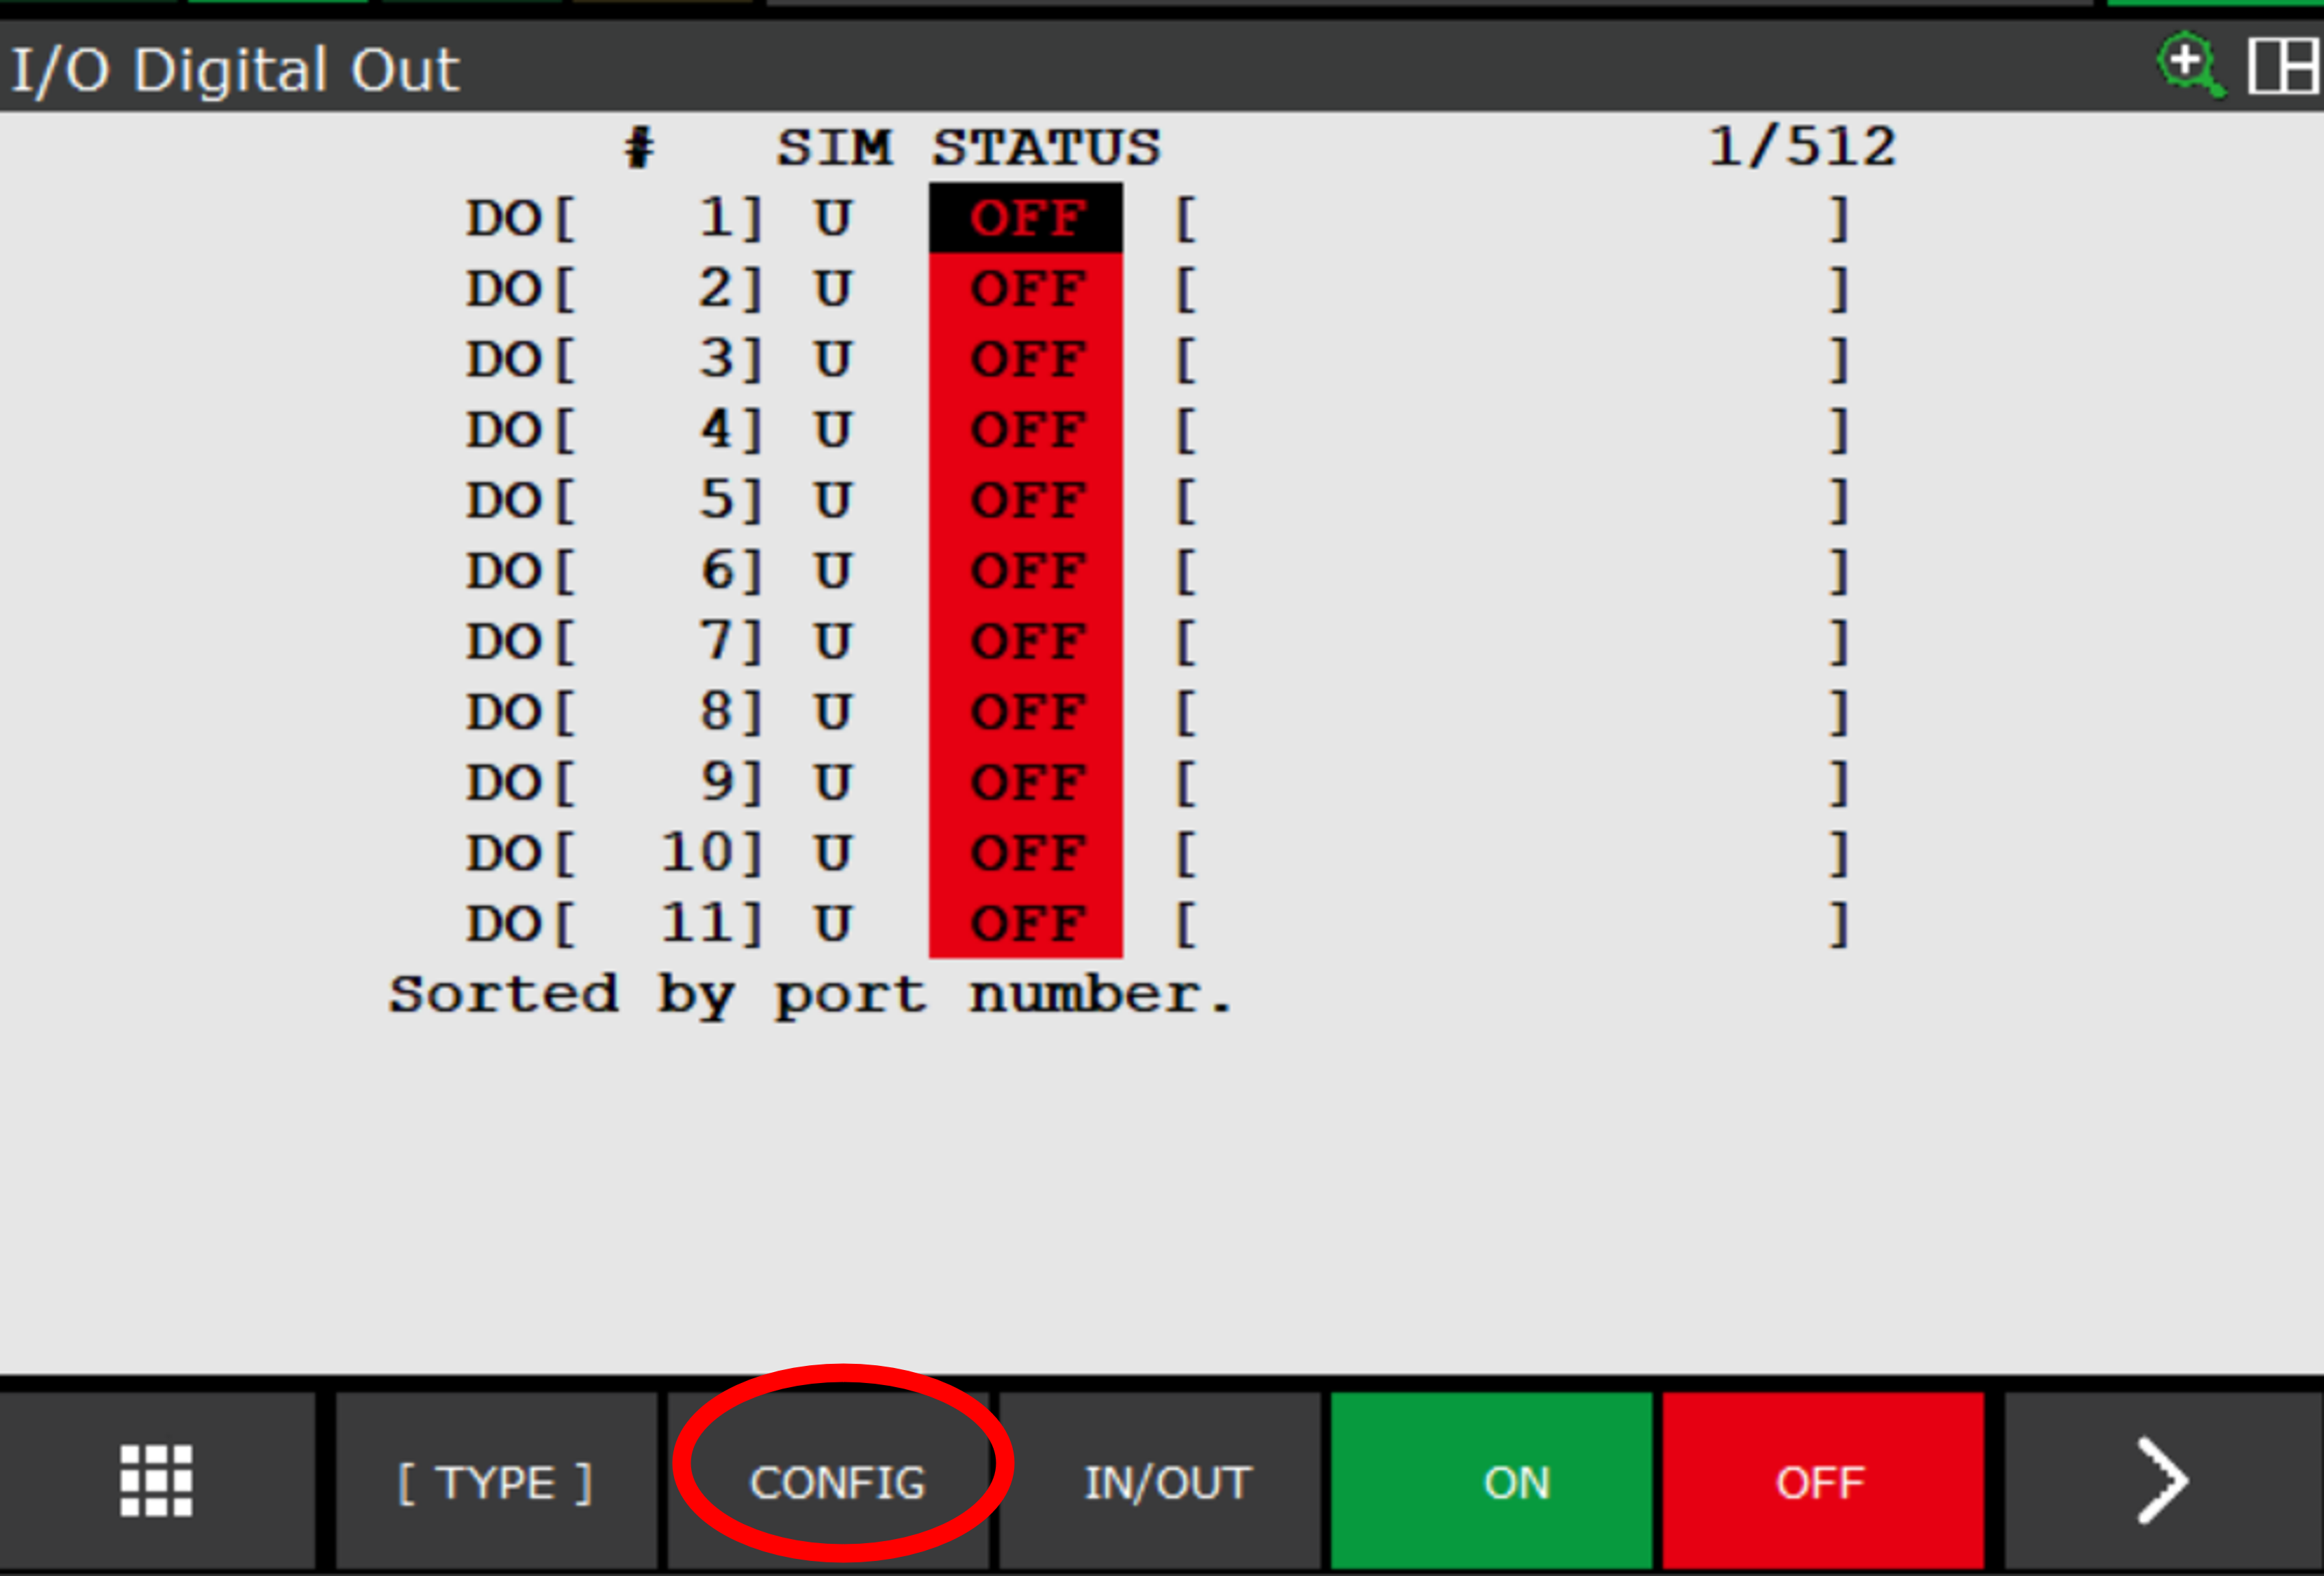
Display the DO screen from the I/O screen.
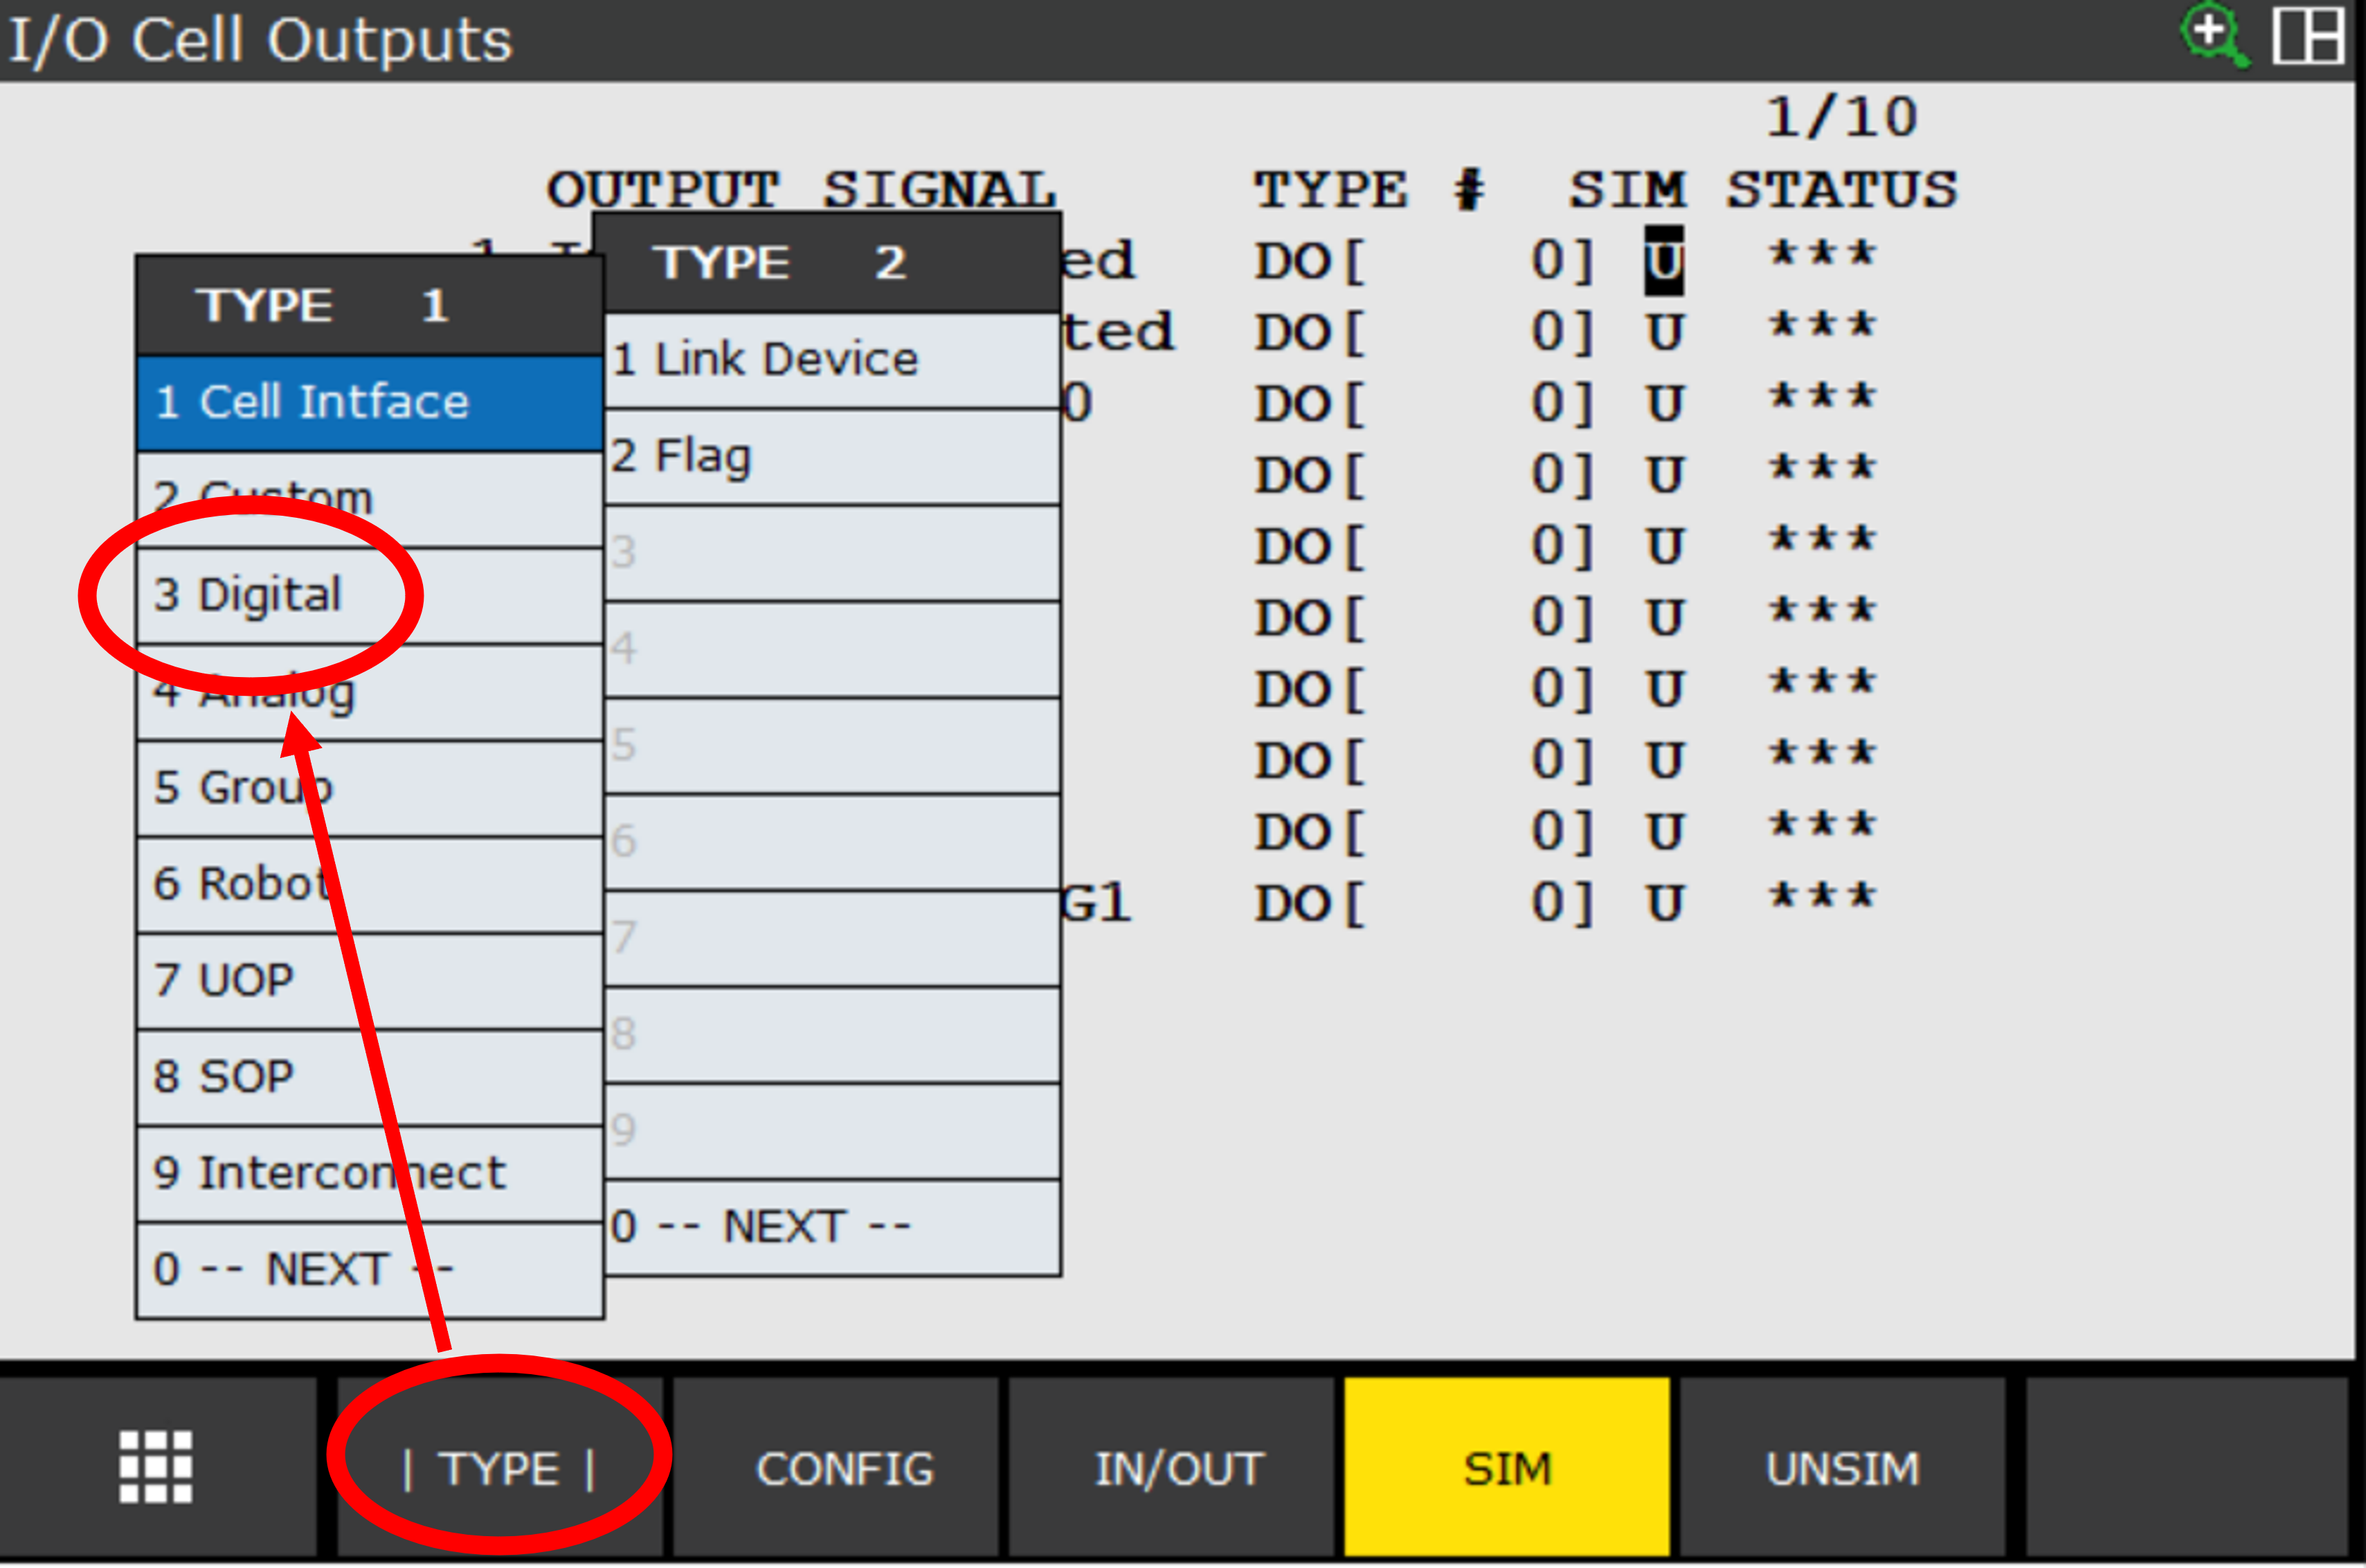
Display the DO’s configuration screen.
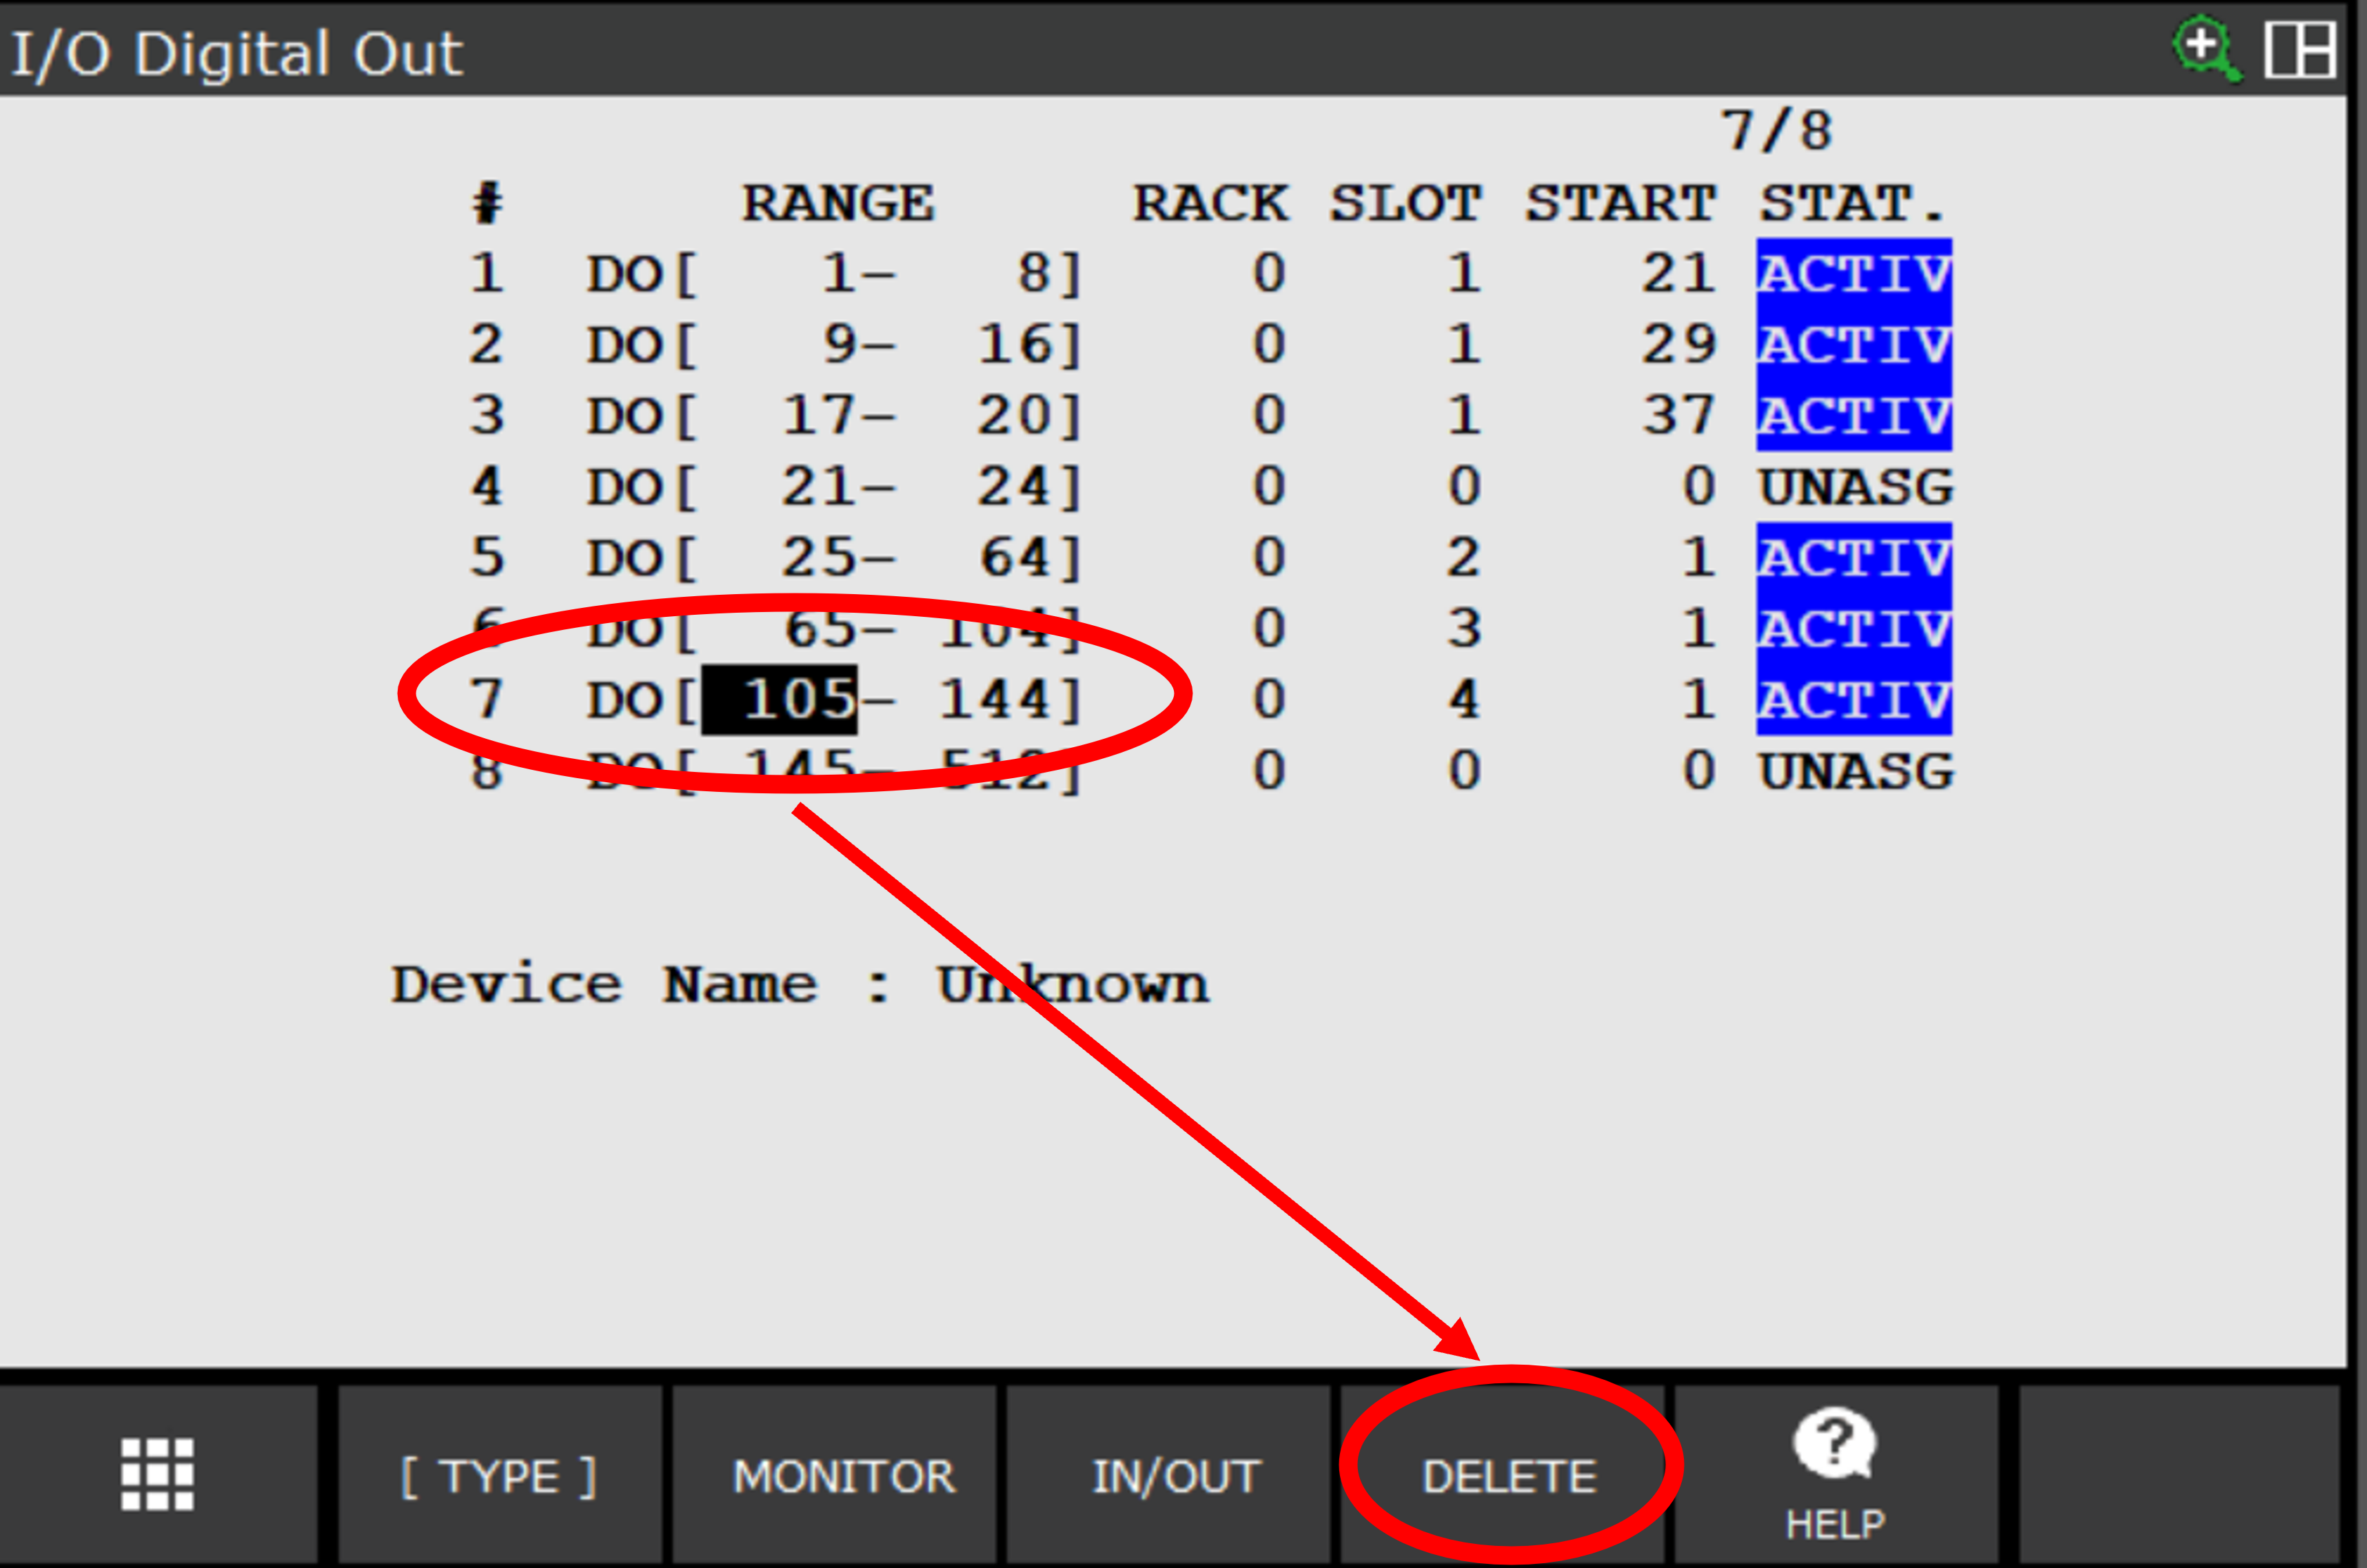
Delete the assignment for DO[105-144].
Change the assignment range from 104 to 144 so that DO[65-144] are assigned continuously.
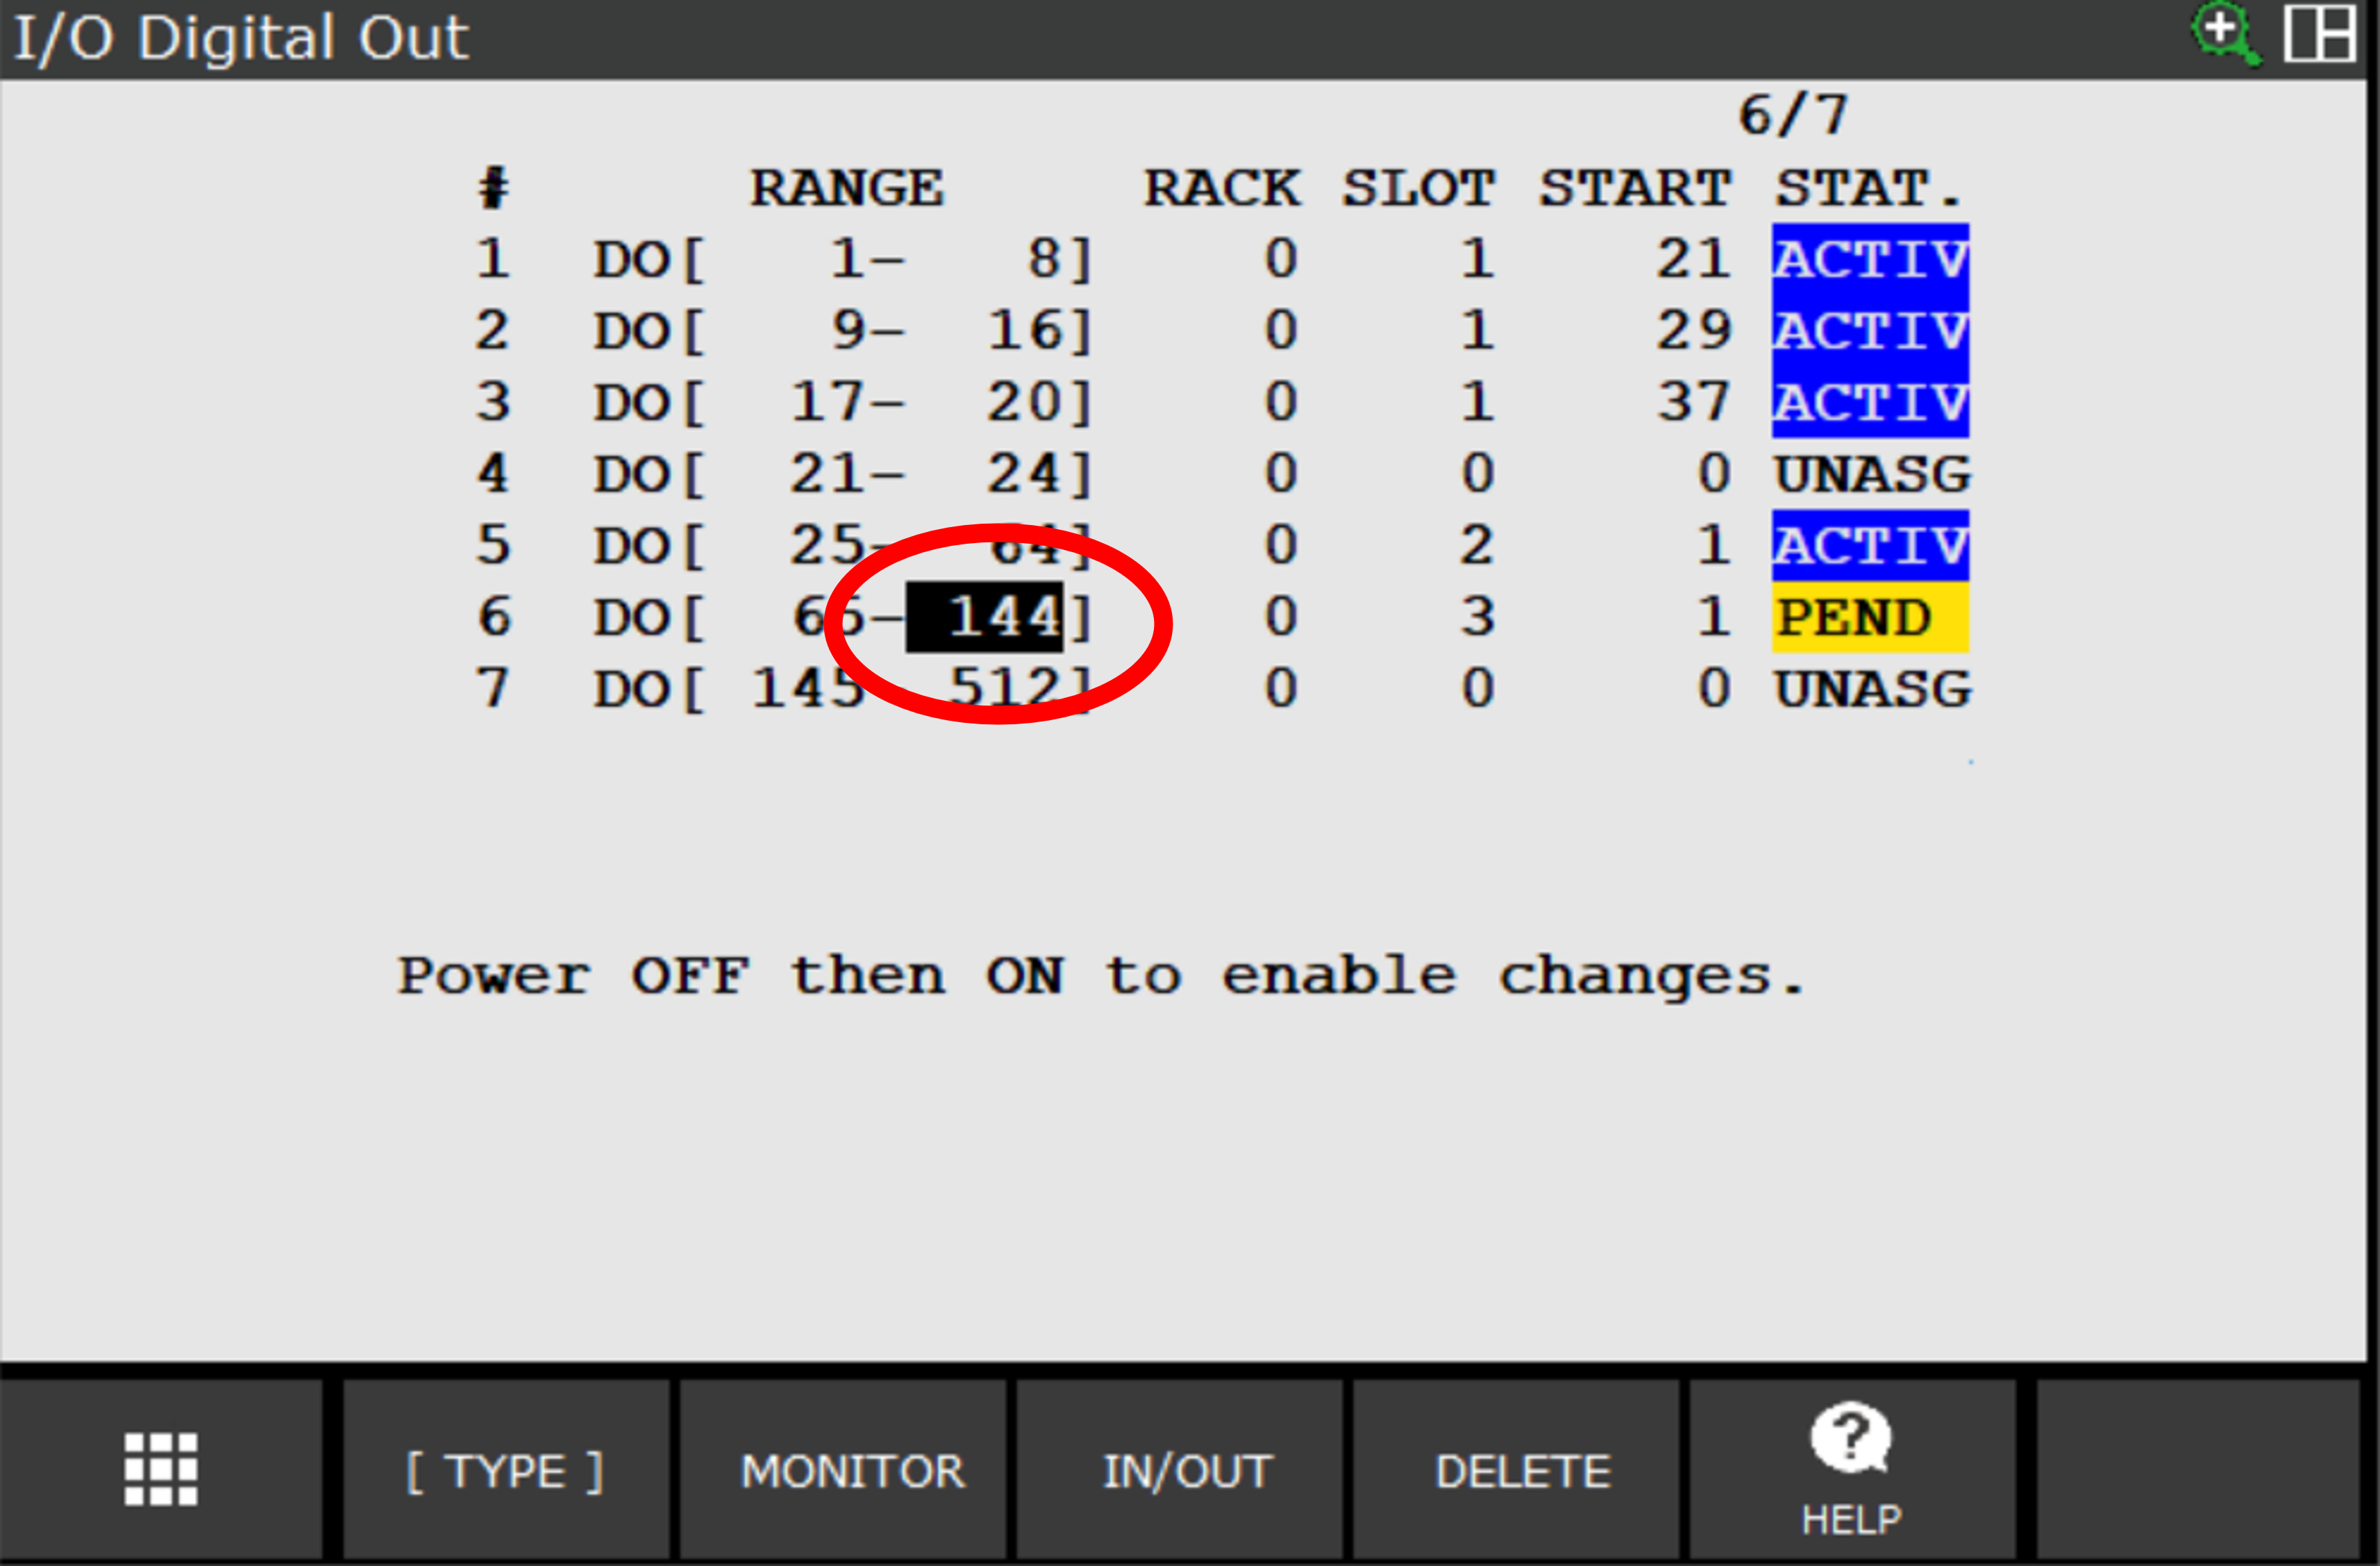
Perform the same procedure on the DI screen.
Repower the controller.